LNMP是Linux+Nginx+MariaDB/MySQL+PHP环境的缩写,按照发音,也写作LEMP环境。本文讲述如何在Ubuntu 22.04中安装和配置Nginx+MariaDB/MySQL+PHP。
硬件环境
Lenovo ThinkPad T14 Gen2 20W1S3H811: Intel i5-1145G7 + DDR4 16GB + NVMe 512GB
软件环境
Win11 x64 Build 22621.2134 英文专业版 + VirtualBox v7.0.8 r156879
VirtualBox安装Xubuntu 22.04
Xubuntu是基于Ubuntu的Linux发行版,采用轻量级的XFce桌面环境,并对低端计算机做了优化。本文后面提到Ubuntu时,除非明确指出,否则均默认是Xubuntu。
为减少安装时间和避免麻烦,安装时选English作为系统语言,选择Minimal Installation最小安装,城市选默认的New York纽约。
Ubuntu 22.04准备工作
启用root账户
Ubuntu默认没有启用root账户。在生产环境中,强烈建议非必要不要启用root账户。本文仅为方便而启用了root账户,后续Shell命令默认均以root账号运行。
在Ubuntu中启用root账户非常简单,为其设置密码即可。passwd root
APT换国内源
Ubuntu的包管理器APT默认的源在国外,从国内访问速度很慢。为方便使用,有必要为APT换国内源。常用的有阿里源、清华源、中科大源、网易163源等。
/etc/apt/sources.list文件记录着APT的源,编辑此文件即可使用不同的源。mv /etc/apt/sources.list /etc/apt/source.list.original # 备份sources.listtouch /etc/apt/sources.list # 创建空文件sources.listvi /etc/apt/sources.list # 编辑sources.list,录入以下内容# 默认注释了源码镜像以提高 apt update 速度,如有需要可自行取消注释
# 阿里源
deb https://mirrors.aliyun.com/ubuntu/ jammy main restricted universe multiverse
# deb-src https://mirrors.aliyun.com/ubuntu/ jammy main restricted universe multiverse
deb https://mirrors.aliyun.com/ubuntu/ jammy-security main restricted universe multiverse
# deb-src https://mirrors.aliyun.com/ubuntu/ jammy-security main restricted universe multiverse
deb https://mirrors.aliyun.com/ubuntu/ jammy-updates main restricted universe multiverse
# deb-src https://mirrors.aliyun.com/ubuntu/ jammy-updates main restricted universe multiverse
deb https://mirrors.aliyun.com/ubuntu/ jammy-proposed main restricted universe multiverse
# deb-src https://mirrors.aliyun.com/ubuntu/ jammy-proposed main restricted universe multiverse
deb https://mirrors.aliyun.com/ubuntu/ jammy-backports main restricted universe multiverse
# deb-src https://mirrors.aliyun.com/ubuntu/ jammy-backports main restricted universe multiverse
也可以使用清华源、中科大源、网易163源。以清华源为例,将/etc/apt/sources.list内容替换为以下内容:# 默认注释了源码镜像以提高 apt update 速度,如有需要可自行取消注释
#清华源
deb https://mirrors.tuna.tsinghua.edu.cn/ubuntu/ jammy main restricted universe multiverse
# deb-src https://mirrors.tuna.tsinghua.edu.cn/ubuntu/ jammy main restricted universe multiverse
deb https://mirrors.tuna.tsinghua.edu.cn/ubuntu/ jammy-updates main restricted universe multiverse
# deb-src https://mirrors.tuna.tsinghua.edu.cn/ubuntu/ jammy-updates main restricted universe multiverse
deb https://mirrors.tuna.tsinghua.edu.cn/ubuntu/ jammy-backports main restricted universe multiverse
# deb-src https://mirrors.tuna.tsinghua.edu.cn/ubuntu/ jammy-backports main restricted universe multiverse
# deb https://mirrors.tuna.tsinghua.edu.cn/ubuntu/ jammy-security main restricted universe multiverse
# deb-src https://mirrors.tuna.tsinghua.edu.cn/ubuntu/ jammy-security main restricted universe multiverse
deb https://security.ubuntu.com/ubuntu/ jammy-security main restricted universe multiverse
# deb-src https://security.ubuntu.com/ubuntu/ jammy-security main restricted universe multiverse
#
# 预发布软件源,不建议启用
# deb https://mirrors.tuna.tsinghua.edu.cn/ubuntu/ jammy-proposed main restricted universe multiverse
# deb-src https://mirrors.tuna.tsinghua.edu.cn/ubuntu/ jammy-proposed main restricted universe multiverse
更新Ubuntu包列表apt update
更新Ubuntu软件apt upgrade
查看Ubuntu版本lsb_release -a
No LSB modules are available.
Distributor ID: Ubuntu
Description: Ubuntu 22.04.3 LTS
Release: 22.04
Codename: jammy
安装Screenapt install screen
查看Screen版本screen -v
Screen version 4.09.00 (GNU) 30-Jan-22
安装Net-Toolsapt install net-tools
查看IP配置ifconfig
安装openssh-serverapt install openssh-server
查看openssh-server版本ssh -V
OpenSSH_8.9p1 Ubuntu-3ubuntu0.3, OpenSSL 3.0.2 15 Mar 2022
允许root用户通过ssh远程登录
编辑/etc/ssh/sshd_config文件vi /etc/ssh/sshd_config
找到#PermitRootLogin prohibit-password
改成PermitRootLogin yes
重启ssh服务systemctl restart sshd
安装Nginx
安装Nginxapt install nginx
查看Nginx版本nginx -v
nginx version: nginx/1.18.0 (Ubuntu)
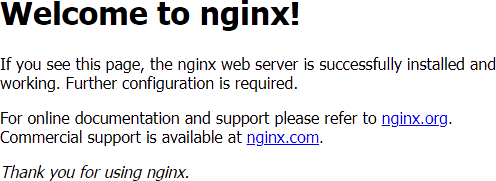
在浏览器地址栏输入 https://Ubuntu_IP/
如Nginx工作正常,可以看到如下图所示页面:
安装php-fpm
注意,此处安装的是php-fpm (FastCGI Process Manager),而不是php。如apt install php,会将apache2一并安装。
安装php-fpmapt install php-fpm
查看php版本php -v
PHP 8.1.2-1ubuntu2.14 (cli) (built: Aug 18 2023 11:41:11) (NTS)
在Nginx中启用php-fpm
准备php测试脚本phpinfo.phpecho '<?php phpinfo();' > /var/www/html/phpinfo.php
在浏览器地址栏输入 https://Ubuntu_IP/phpinfo.php
发现没有获得phpinfo()函数的输出,而是下载了phpinfo.php文件。这是因为Nginx的php-fpm没有正确配置。
编辑Nginx配置文件vi /etc/nginx/sites-enabled/default
找到index index.html index.htm index.nginx-debian.html;
改成index index.php index.html index.htm index.nginx-debian.html;
将server{}段中的location ~ \.php$ {}段修改为以下内容:location ~ .php$ {其中
include snippets/fastcgi-php.conf;
# With php-fpm (or other unix sockets):
fastcgi_pass unix:/run/php/php-fpm.sock;
# With php-cgi (or other tcp sockets):
# fastcgi_pass 127.0.0.1:9000;
}fastcgi_pass unix:/run/php/php-fpm.sock;也可以改成fastcgi_pass unix:/run/php/php8.1-fpm.sock;,目的都是改正fastcgi_pass unix:/run/php/php7.4-fpm.sock;中错误指定的php-fpm版本。
检查Nginx配置文件是否正确nginx -t
如Nginx配置文件正确,会得到以下提示:nginx: the configuration file /etc/nginx/nginx.conf syntax is ok
nginx: configuration file /etc/nginx/nginx.conf test is successful
重启Nginxsystemctl restart nginx
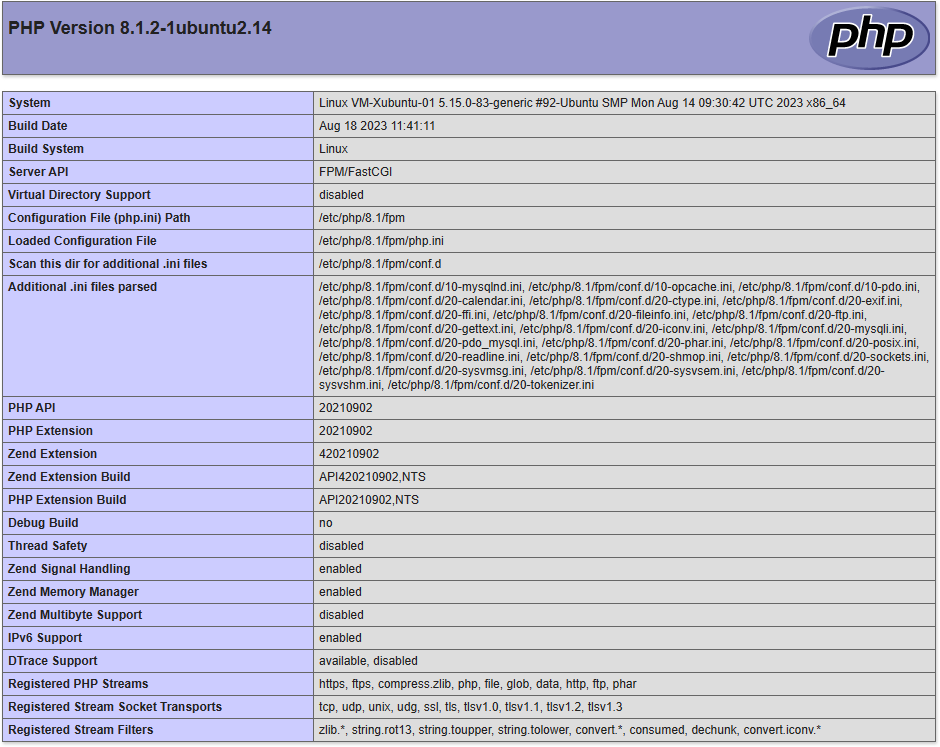
在浏览器地址栏输入 https://Ubuntu_IP/phpinfo.php
如Nginx和php-fpm工作正常,可以看到如下图所示页面:
删除phpinfo.php以免服务器信息泄露rm /var/www/html/phpinfo.php
安装配置MariaDB/MySQL(二选一,默认不共存)
安装配置MariaDB
安装MariaDBapt install mariadb-server
查看MariaDB版本mariadb -V
mariadb Ver 15.1 Distrib 10.6.12-MariaDB, for debian-linux-gnu (x86_64) using EditLine wrapper
增强MariaDB安全性mariadb-secure-installation # 注意这里是连线符-Enter current password for root (enter for none): # MariaDB默认root密码为空Switch to unix_socket authentication [Y/n] Y # 切换到unix_socket认证方式Change the root password? [Y/n] n # unix_socket认证通过系统账户进行,这里可以保持MariaDB的root密码为空Remove anonymous users? [Y/n] Y # 移除系统内置的匿名用户Disallow root login remotely? [Y/n] Y # 禁止MariaDB的root用户远程登录Remove test database and access to it? [Y/n] Y # 移除系统内置的测试数据库Reload privilege tables now? [Y/n] Y # 重新加载权限表
(可选项)修改MariaDB认证方式
MariaDB默认使用unix_socket认证方式,即以OS用户账号登录MariaDB,安全性由OS保证,数据库用户默认空密码。详见MariaDB官网解释:Authentication Plugin – Unix Socket – MariaDB Knowledge Base
可以修改MariaDB认证方式为MySQL密码方式mysql_native_password。操作流程如下:mariadb或mysqlMariaDB [(none)]> use mysql;
MariaDB [mysql]> select user, plugin from user where user='root';
如果plugin是unix_socket,参考MariaDB官网,用以下SQL语句修改:MariaDB [mysql]> alter user 'root'@'localhost' identified via mysql_native_password; # 修改认证方式MariaDB [mysql]> alter user 'root'@'localhost' identified by 'root_password'; # 必须修改密码才能生效。否则root用户仍可以用空密码进入MariaDB。MariaDB [mysql]> exit; # 退出MariaDB
安装配置MySQL
安装MySQLapt install mysql-server
查看MySQL版本mysql -V
mysql Ver 8.0.34-0ubuntu0.22.04.1 for Linux on x86_64 ((Ubuntu))
增强MySQL安全性mysql_secure_installation # 注意这里是下划线_Press y|Y for Yes, any other key for No: n # 这里敲Y的话则MySQL用户密码必须满足复杂度要求Remove anonymous users? (Press y|Y for Yes, any other key for No) : Y # 移除系统内置的匿名用户Disallow root login remotely? (Press y|Y for Yes, any other key for No) : Y # 禁止MySQL的root用户远程登录Remove test database and access to it? (Press y|Y for Yes, any other key for No) : Y # 移除系统内置的测试数据库Reload privilege tables now? (Press y|Y for Yes, any other key for No) : Y # 重新加载权限表
(可选项)修改MySQL认证方式
MySQL 8 root账户默认使用auth_socket认证方式,即以OS用户账号登录MariaDB,安全性由OS保证,数据库root用户默认空密码;其他MySQL 8账户默认使用caching_sha2_password认证方式。详见MySQL官网解释:MySQL :: MySQL Secure Deployment Guide :: 11 Enabling Authentication
修改MySQL认证方式操作步骤参考修改MariaDB认证方式。
PHP安装php-mysql PDO模块以访问MariaDB/MySQLapt install php-mysql
Leave a Reply